使用React和Three.js实现NII格式CT数据的3D可视化预览
引言
医学影像数据的可视化是现代医疗技术中不可或缺的部分。NIfTI(Neuroimaging Informatics Technology Initiative)格式是神经影像学中常用的一种文件格式,广泛应用于CT、MRI等医学影像数据的存储和分析。本文将详细介绍如何使用React、Ant Design和Three.js构建一个功能完善的NII格式CT数据3D预览工具。
技术栈
- React:前端UI构建
- Ant Design:UI组件库
- Three.js:WebGL 3D渲染库
- nifti-reader-js:NIfTI格式解析库
功能特点
- 支持.nii和.nii.gz格式文件的加载和预览
- 实时3D体积渲染
- 可调节阈值和不透明度
- 支持窗宽窗位调整
- 支持4D数据(带时间序列)的预览和时间点切换
- 交互式相机控制
实现原理
1. 文件加载与解析
首先,需要加载NII文件并使用nifti-reader-js库解析文件内容:
const loadNiiFile = (file: File) => {
  setLoading(true);
  setTimePoint(0);

  const reader = new FileReader();
  reader.onload = function (event: ProgressEvent<FileReader>) {
    try {
      const buffer = event.target.result as ArrayBuffer;

      // 验证文件是否为有效的NIfTI格式
      if (!nifti.isNIFTI(buffer)) {
        setError("不是有效的NIfTI文件");
        setLoading(false);
        return;
      }

      // 解析NIfTI头部
      const header = nifti.readHeader(buffer) as NiftiHeader;
      headerRef.current = header;

      // 读取体素数据
      const image = nifti.readImage(header, buffer);
      if (!image) {
        setError("无法读取图像数据");
        setLoading(false);
        return;
      }

      // 检查是否为4D数据
      const is4D = header.dims[0] >= 4 && header.dims[4] > 1;
      setIs4D(is4D);

      if (is4D) {
        setTimePoints(header.dims[4]);
        processVolumeData4D(header, image);
      } else {
        setTimePoints(1);
        processVolumeData(header, image);
      }
    } catch (err: any) {
      setError(`文件解析错误: ${err.message}`);
      setLoading(false);
    }
  };

  reader.readAsArrayBuffer(file);
};
2. 体积渲染实现
体积渲染是通过WebGL着色器实现的。使用了光线投射(Ray Casting)技术来渲染3D体积数据:
precision highp float;
precision highp sampler3D;

uniform sampler3D map;
uniform float threshold;
uniform float steps;
uniform float opacity;

varying vec3 vOrigin;
varying vec3 vDirection;

vec2 hitBox(vec3 orig, vec3 dir) {
  const vec3 box_min = vec3(-0.5);
  const vec3 box_max = vec3(0.5);
  vec3 inv_dir = 1.0 / dir;
  vec3 tmin_tmp = (box_min - orig) * inv_dir;
  vec3 tmax_tmp = (box_max - orig) * inv_dir;
  vec3 tmin = min(tmin_tmp, tmax_tmp);
  vec3 tmax = max(tmin_tmp, tmax_tmp);
  float t0 = max(tmin.x, max(tmin.y, tmin.z));
  float t1 = min(tmax.x, min(tmax.y, tmax.z));
  return vec2(t0, t1);
}

void main() {
  vec3 rayDir = normalize(vDirection);
  vec2 bounds = hitBox(vOrigin, rayDir);

  if (bounds.x > bounds.y) {
    discard;
  }

  bounds.x = max(bounds.x, 0.0);

  vec3 point = vOrigin + bounds.x * rayDir;
  vec3 inc = 1.0 / abs(rayDir);
  float delta = min(inc.x, min(inc.y, inc.z)) / steps;

  vec4 accumulatedColor = vec4(0.0);

  for (float t = bounds.x; t < bounds.y; t += delta) {
    point = vOrigin + t * rayDir;
    vec3 samplePos = point + 0.5;

    float intensity = texture(map, samplePos).r;

    if (intensity > threshold) {
      float alpha = opacity * (1.0 - accumulatedColor.a);
      accumulatedColor.rgb += alpha * vec3(intensity);
      accumulatedColor.a += alpha;

      if (accumulatedColor.a >= 0.95) {
        break;
      }
    }
  }

  if (accumulatedColor.a == 0.0) {
    discard;
  }

  gl_FragColor = vec4(accumulatedColor.rgb, accumulatedColor.a);
}
3. 窗宽窗位调整
窗宽窗位是医学影像中常用的参数,用于调整图像的对比度和亮度:
// 将体素数据规范化到0-255之间
for (let i = 0; i < dataArray.length; i++) {
  // 应用窗口级别和窗口宽度
  let pixelValue = dataArray[i];

  // 窗口级别和窗口宽度的应用
  const lower = windowCenter - windowWidth / 2;
  const upper = windowCenter + windowWidth / 2;

  if (pixelValue <= lower) {
    pixelValue = 0;
  }
  else if (pixelValue >= upper) {
    pixelValue = 255;
  }
  else {
    pixelValue = ((pixelValue - lower) / (upper - lower)) * 255;
  }

  data[i] = pixelValue;
}
4. 4D数据处理
4D数据包含多个时间点的3D数据,可以通过时间轴控制来浏览不同时间点的数据:
// 处理4D体积数据
const processVolumeData4D = (header: NiftiHeader, imageData: any) => {
  try {
    // 获取体素维度
    const xLength = header.dims[1];
    const yLength = header.dims[2];
    const zLength = header.dims[3];
    const tLength = header.dims[4];

    // 处理每个时间点的数据
    for (let t = 0; t < tLength; t++) {
      const data = new Uint8Array(volumeSize);

      // 处理数据...

      allTimePointsData.push(data);
    }

    // 渲染初始时间点的数据
    renderVolume(allTimePointsData[0], { xLength, yLength, zLength });
  }
  catch (err: any) {
    setError(`处理错误: ${err.message}`);
    setLoading(false);
  }
};
用户界面
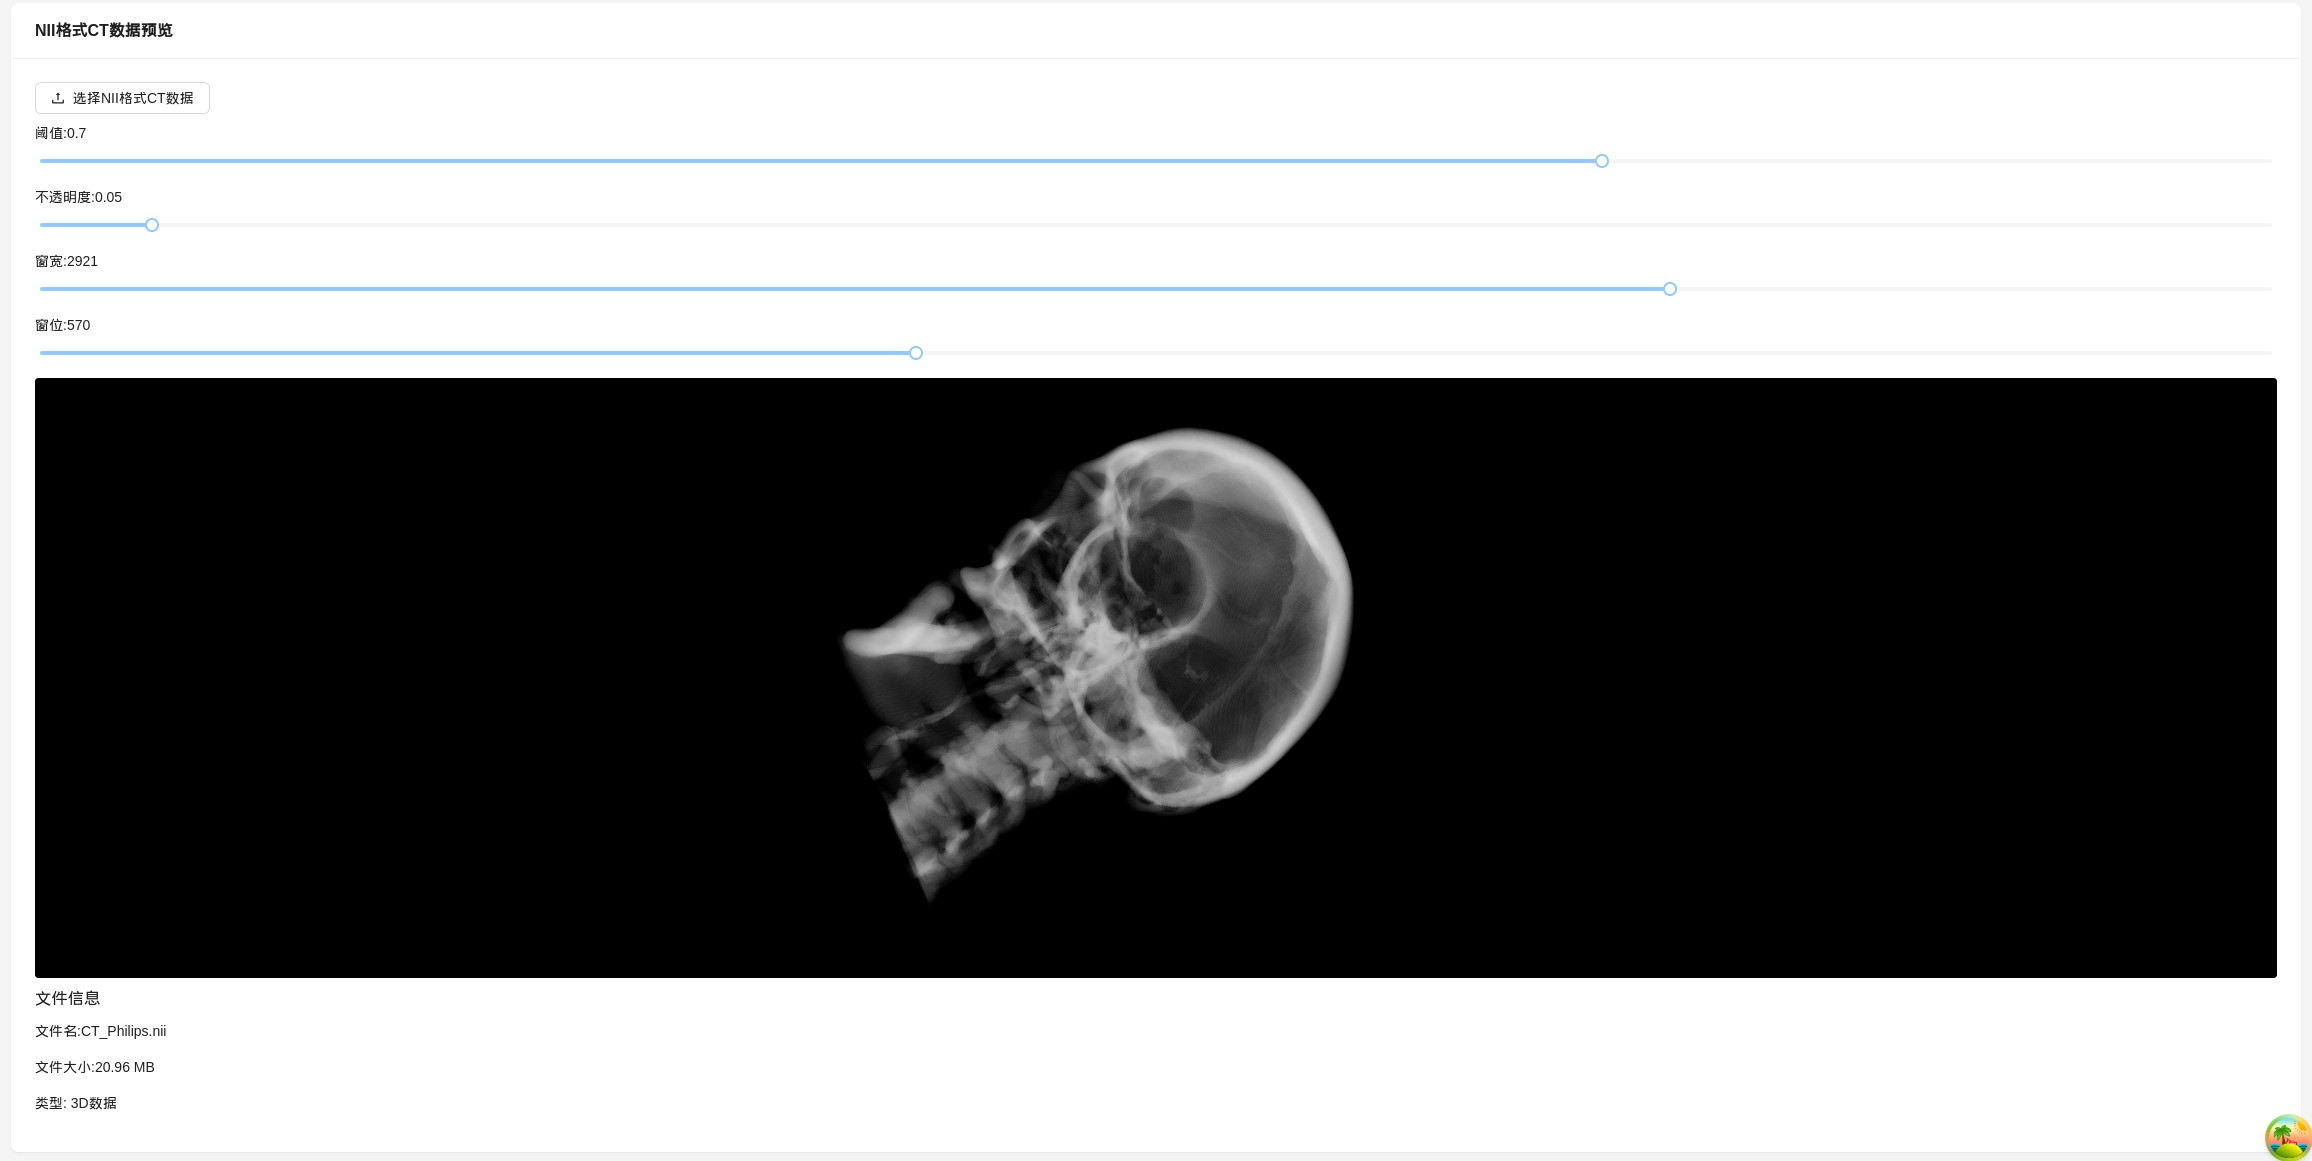
用户界面使用Ant Design组件实现,包含以下主要部分:
- 文件上传组件
- 参数调整滑块(阈值、不透明度、窗宽窗位)
- 3D渲染视图
- 时间点控制器(针对4D数据)
- 文件信息展示
return (
  <div style={{ padding: "24px" }}>
    <Card title="NII格式CT数据预览" bordered={false}>
      <Space direction="vertical" style={{ width: "100%" }}>
        <Upload
          accept=".nii,.nii.gz"
          maxCount={1}
          showUploadList={false}
          customRequest={customRequest}
          onChange={handleFileChange}
        >
          <Button icon={<UploadOutlined />}>选择NII格式CT数据</Button>
        </Upload>

        {/* 参数调整区域 */}
        {file && (
          <Space direction="vertical" style={{ width: "100%" }}>
            {/* 阈值调整 */}
            <div>
              <span>阈值: {threshold}</span>
              <Slider
                min={0}
                max={1}
                step={0.01}
                value={threshold}
                onChange={value => setThreshold(value)}
              />
            </div>

            {/* 其他参数控制... */}

            {/* 时间点控制 */}
            {is4D && (
              <div>
                <span>时间点: {timePoint + 1}/{timePoints}</span>
                <Row gutter={8} align="middle">
                  {/* 时间点控制组件... */}
                </Row>
              </div>
            )}
          </Space>
        )}

        {/* 3D渲染视图 */}
        <div
          ref={containerRef}
          style={{
            width: "100%",
            height: "600px",
            background: "#000",
            position: "relative",
            borderRadius: "4px",
            overflow: "hidden",
          }}
        >
          {loading && (
            <div style={{
              position: "absolute",
              top: 0,
              left: 0,
              right: 0,
              bottom: 0,
              display: "flex",
              justifyContent: "center",
              alignItems: "center",
              background: "rgba(0,0,0,0.5)",
              zIndex: 10,
            }}
            >
              <Spin size="large" tip="加载中..." />
            </div>
          )}
        </div>

        {/* 文件信息 */}
        {file && (
          <div>
            <h3>文件信息</h3>
            <p>文件名: {file.name}</p>
            <p>文件大小: {(file.size / 1024 / 1024).toFixed(2)} MB</p>
            {is4D && (
              <p>类型: 4D数据 ({timePoints} 个时间点)</p>
            )}
            {!is4D && <p>类型: 3D数据</p>}
          </div>
        )}
      </Space>
    </Card>
  </div>
);